

I make a lot of pancakes. This is my pancake journey.
Back when Little Bread Toddler wasn't drinking milk, it was a way for us to sneak it into his diet. Now he alternates between scrambled eggs and pancakes most mornings.
For about years, I used the Joy of Cooking's pancake recipe. It was pretty easy and I was able to improve my technique making a batch a week. However, they weren't great. They tasted good but they kept coming out flat. I wanted nice, puffy pancakes.
I tried Smitten Kitchen's pancakes, which rely on beaten egg whites for lift. While they have a delicious tangy taste and do puff up when they cook, they also immediately deflate as they cool, which means they are wonderful freshly cooked but the pancakes I freeze don't do so well. Also the extra step of beating the egg whites to stiff peaks takes too much time.
Then a few weeks ago, I ran out of milk. All I had was some sour cream, so I added it in and compensated for the decreased liquid by throwing in an extra egg. I also added some baking soda to account for the added acidity from the sour cream. The results were amazing. So much so that I annotated my Joy:
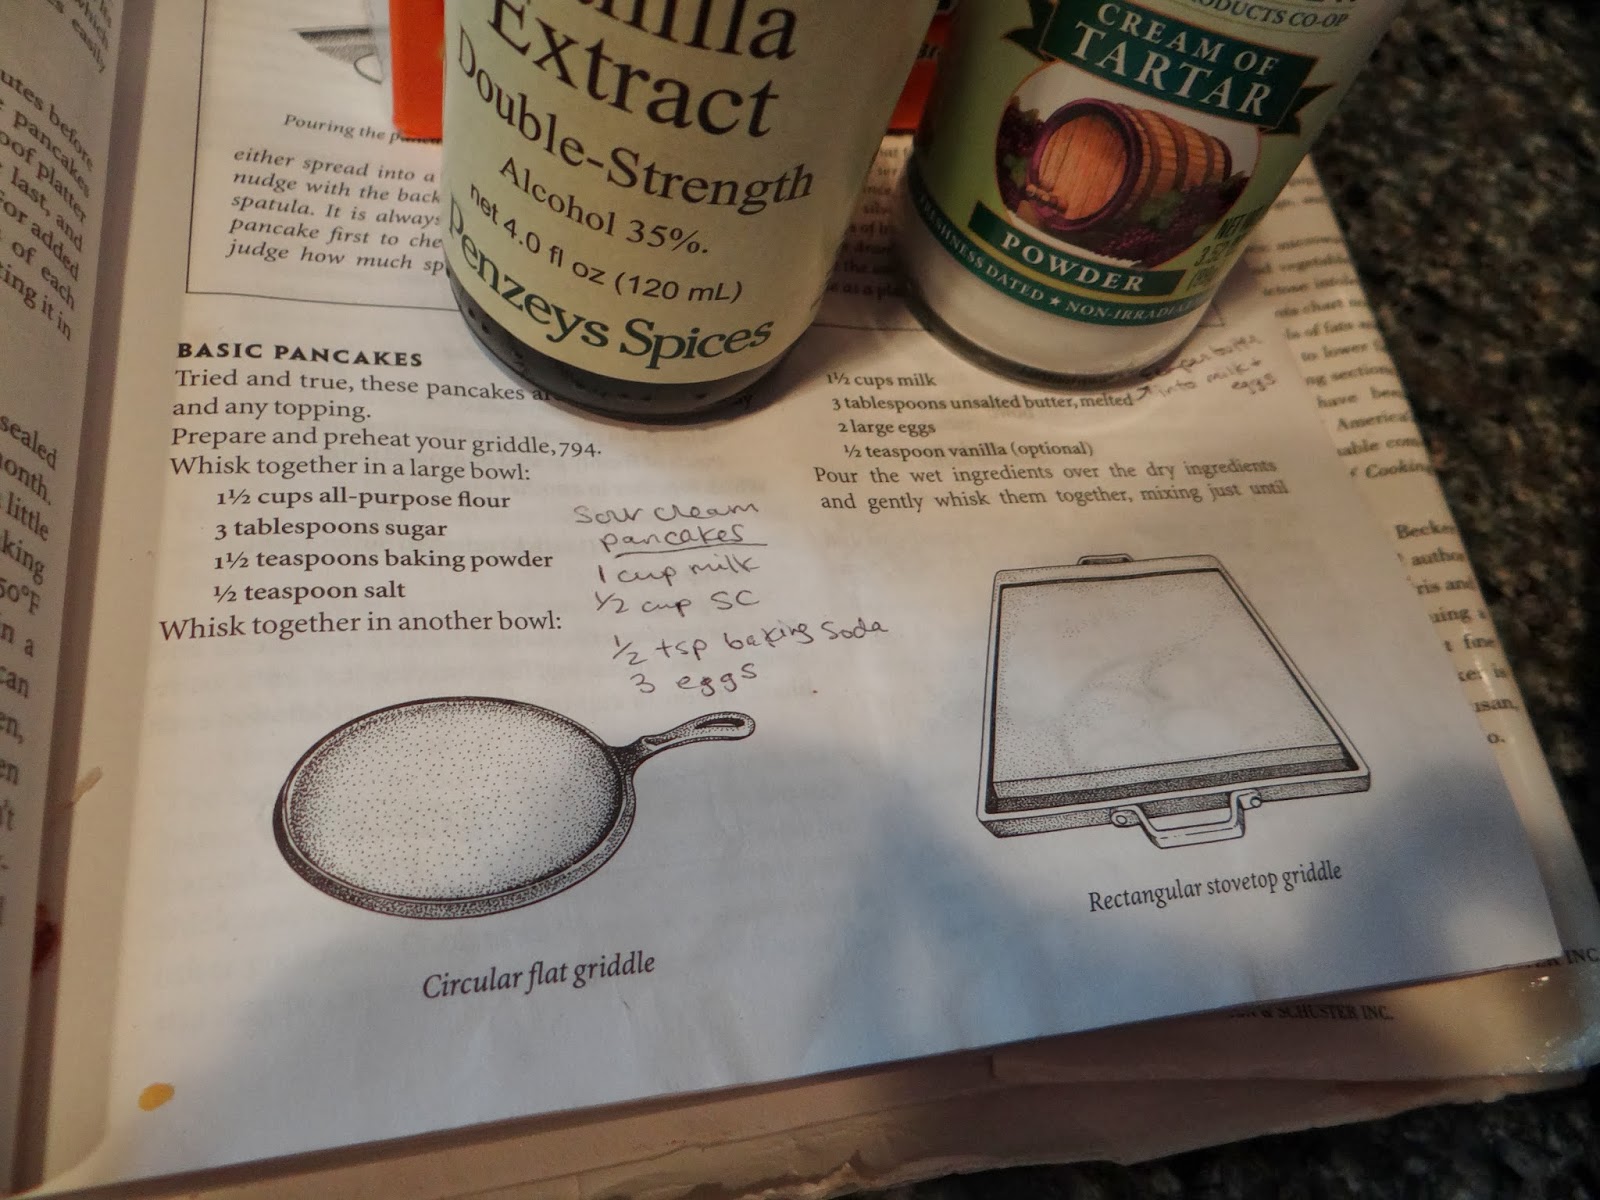
These sour cream pancakes are so delicious, puffy and light. They also keep really well in the freezer (more on that later).
To make these, you will need:

Sorry. For some reason I pulled out the cream of tartar instead of baking powder when I took this picture.
The dry ingredients:
1 1/2 cup AP flour
3 tablespoons sugar
1/2 tsp salt
1/2 tsp baking soda
1 1/2 tsp baking powder
The wet ingredients:
1 cup milk
1/2 cup sour cream
3 eggs
3 tablespoons butter (melted)
splash of vanilla extract
1. Pull out your griddle and get it heating up while you combine the ingredients. I usually like the griddle to be at about 400 degrees F. If you don't have a thermometer, you will know the griddle is ready when water or butter starts sizzling upon contact.
2. Mix together your dry ingredients in a big bowl. The dry ingredients can sit for a while.

3. Test the griddle to see if it's ready. If it's ready or almost ready, you can start mixing together the wet ingredients. Measure your milk into a large measuring cup. Gently beat your eggs and add them to the milk along with the vanilla extract.

4. Here is where the technique comes into play. Presumably you've just added cold eggs to the cold milk. And now you're going to add warm, melted butter? That butter is going to congeal up right away, or the eggs will curdle. Either way, not a good situation. What you're going to want to do is temper the butter so it is lowered to the temperature of the eggs and milk.
5. First, take your whisk. This is very important. Also a tablespoon. Start gently whisking the melted butter. Scoop up a tablespoon of the egg/milk mixture and drizzle it into the butter as you're whisking. Add another tablespoon of mixture and keep whisking it in. Keep whisking and adding milk until the butter is lukewarm. Congratulations, that's tempering!
6. Now that your butter has cooled off, you will do the opposite thing you just did: drizzle the butter into the milk and eggs while you are whisking to combine thusly:

7. If the griddle is ready, now is the time to add the wet ingredients to the dry ones. Whisk to incorporate all the flour but stop while there are still a few clumps. The batter will be very wet.

8. If the griddle is good and hot, take a dollop of butter and grease the griddle. I use a paper towel to push the butter around.

9. Using a serving spoon or ladle, pour some batter onto the griddle from a height of about one or two inches. That helps the batter form a nice round shape.

10. You will know it's time to flip when the top has some popped bubbles but mostly when the top stops being slick and shiny.

The sides of these are also pulling away from the griddle, so I knew they were ready to flip. It just takes practice for you to really tell when they're ready.

The second side takes less time than the first. When they are done, put them on a plate to cool. You can even put them in a warm oven until you are done with the whole batch and then serve them later.

PUFFAY.

Here is my beautiful set-up to showcase my lovely pancakes:


Wait. STOP. I'm trying to get a picture here...

No no no... that fork was part of my beautiful tablescape ...

Oh well. That's the way it goes with pancakes in this house.

Sometimes he drinks coffee and pretends he's a grown up

I know I promised some tips on freezing pancakes. The easiest way is just to throw them in a ziploc bag and call it a day, but I have found that makes them stick together. The BEST way is to lay them out on a cookie sheet in the freezer, then transfer them to a ziploc when they are a little frozen. That way they don't stick together.

It's weird but it works. And that way LBT gets pancakes any day of the week he wishes.
I hope you try these sour cream pancakes. I bet they would work with yogurt too. Go crazy!
No comments:
Post a Comment